触发器类型:
1.扫码数据表触发推送: 逐行扫描指定数据表的内容,每扫描一行都会执行触发器中的表达式脚本,触发器脚本可以通过alarm.add()和alarm.send()来控制消息推送
alarm.add(): 将当前行内容加到dataRow中,等待数据表的所有行都扫描完后再触发推送,适用于下面的场景1
alarm.send():立即触发推送,适用于下面的场景2
2. 被动通知:报表刷新:报表更新后触发推送通知
对应两种应用场景的用法:
|
设置通知的标题

| 指定时间内不重复通知,不能为0、不能为空不填写、最小填“1”分钟。 |
2. 设置通知的触发器表达式

内置函数:
| 函数 | 描述 |
|---|---|
| alarm.send(); | 立即发送推送通知 适用场景:根据数据权限分别发送通知给不同的用户,比如店长 |
| alarm.add(); | 将数据行添加到变量dataRow中,可在通知内容中使用该变量 适用场景:将一个列表发送给管理员 |
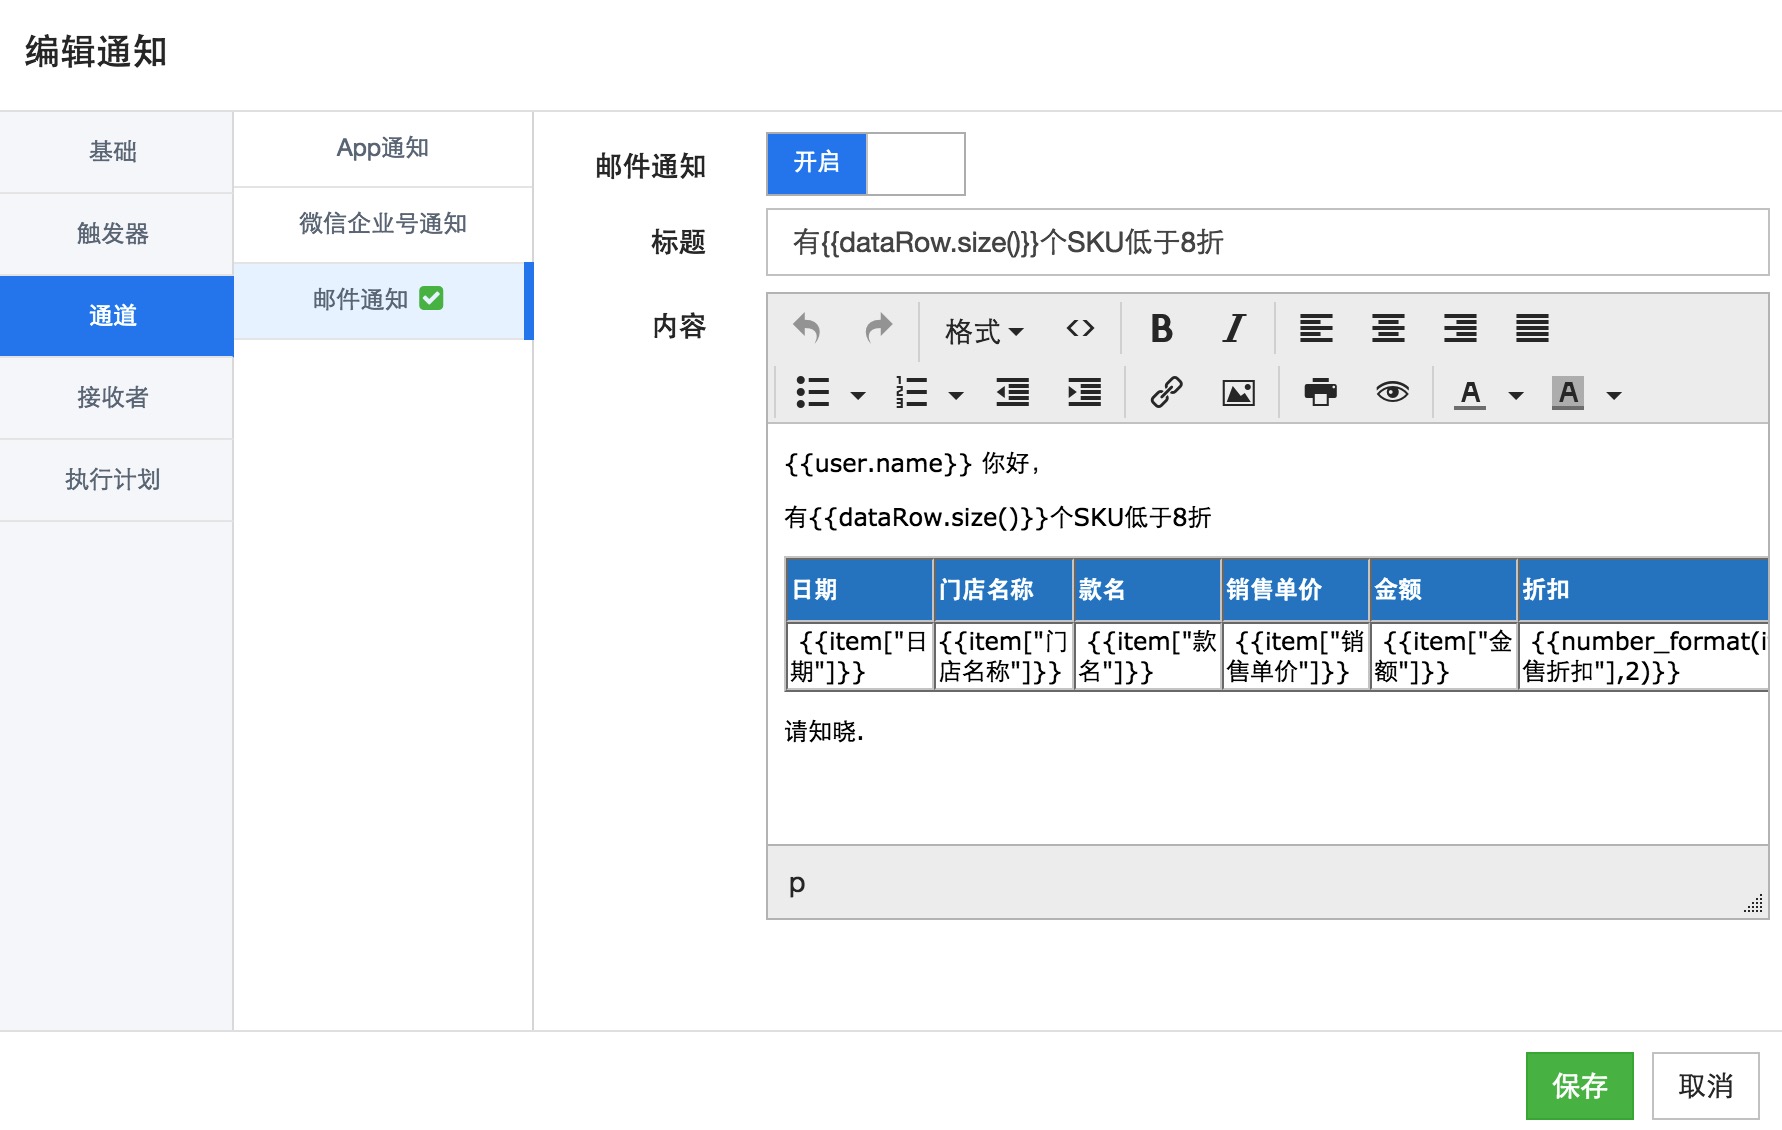
3. 设置通知内容模板

<p>{{user.name}} 你好,</p>
<p>有{{dataRow.size()}}个SKU低于8折</p>
<table style="border-color: #cfcfcf;" border="1" width="453" cellspacing="0">
<tbody>
<tr style="height: 28.05px; background-color: #2d8ac7; color: #fff; font-weight: bold;">
<td style="width: 50px; height: 28.05px;">序号</td>
<td style="width: 70.1167px; height: 28.05px;">日期</td>
<td style="width: 188.883px; height: 28.05px;">门店名称</td>
<td style="width: 70.1167px; height: 28.05px;">款名</td>
<td style="width: 97px; height: 28.05px;">销售单价</td>
<td style="width: 69px; height: 28.05px;">金额</td>
<td style="width: 69px; height: 28.05px;">折扣</td>
</tr>
<!--{% for item in dataRow %} -->
<tr style="height: 12px;">
<td style="width: 70.1167px; height: 12px;">{{loop.index}}</td>
<td style="width: 70.1167px; height: 12px;">{{item["日期"]}}</td>
<td style="width: 188.883px; height: 12px;">{{item["门店名称"]}}</td>
<td style="width: 70.1167px; height: 12px;">{{item["款名"]}}</td>
<td style="width: 97px; height: 12px;">{{item["销售单价"]}}</td>
<td style="width: 69px; height: 12px;">{{item["金额"]}}</td>
<td style="width: 69px; height: 12px;">{{number_format(item["销售折扣"],2)}}</td>
</tr>
<!--{% endfor %} --></tbody>
</table>
<p>请知晓.</p> |
点击查看内容模板脚本语法 |
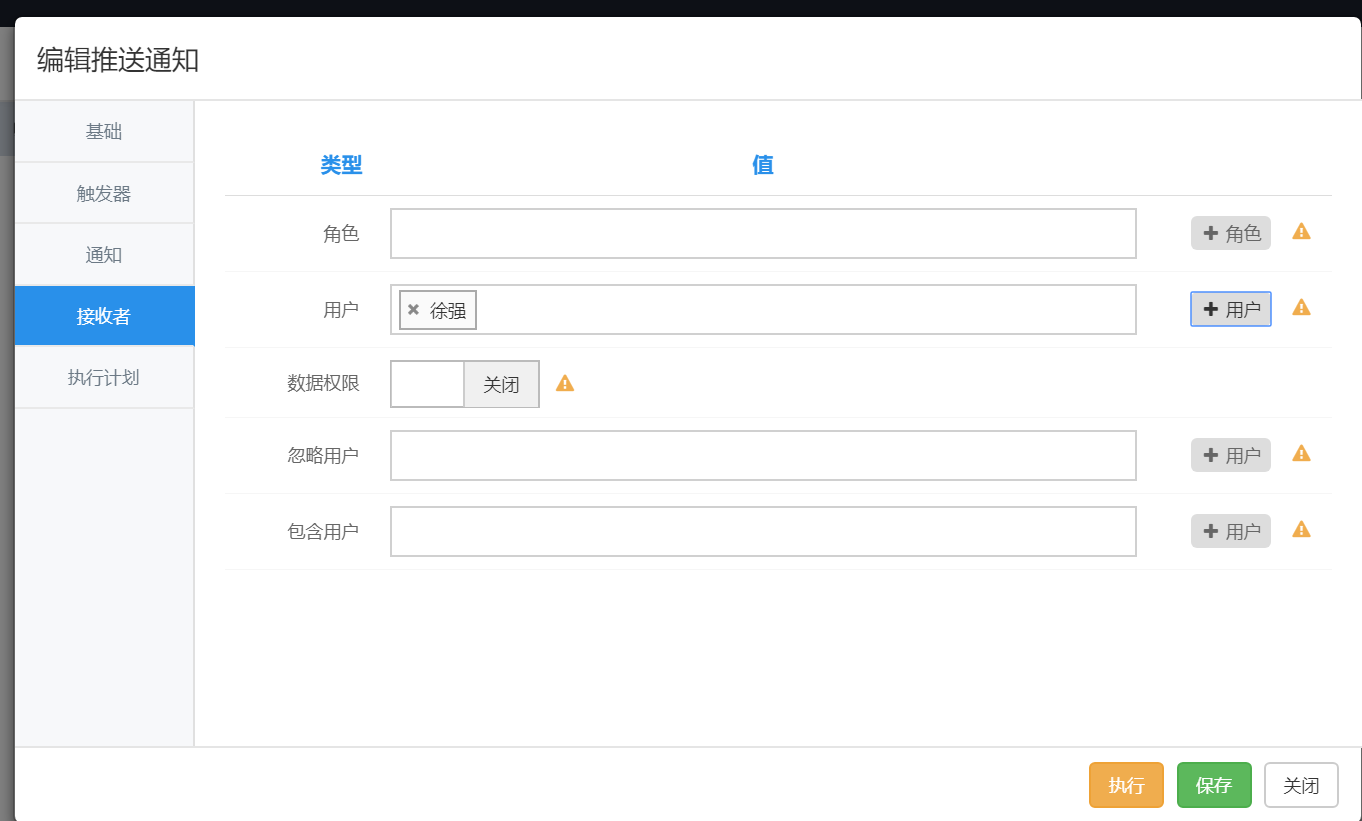
4. 设置接受者

指定角色、指定用户、或按数据权限 只能三选一,常用是 数据权限 配合使用
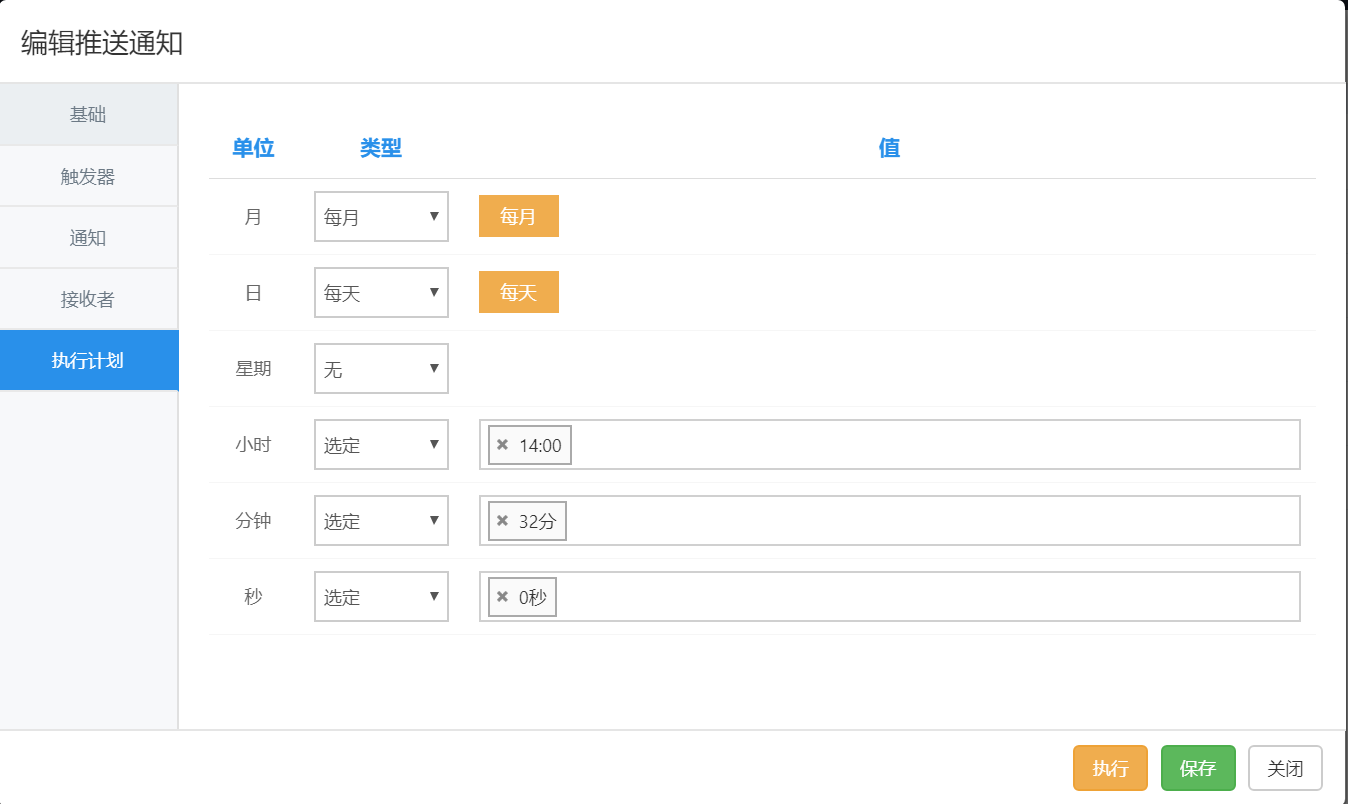
5. 设置通知的执行时间,例如下图:每天早上8点执行
